Watermarks are usually there for a reason, but sometimes you might want to remove them, whether to check or show your client how your design will look with a clean image, or you want to use it as a wallpaper. You might even want to remove your own watermark, if your website address has changed.
Let’s see how you can do it in Photoshop. Just remember, that it is illegal to remove watermarks from copyrighted content without author’s permission, and use your powers for good.
In this article
Brush over
If your watermark is stamped over a uniform background, then you’re lucky, all you need to do is to simply brush it over with a brush of the same color.

- Press B or choose Brush Tool on the Tools panel. If you see Pencil or something else other than brush, press and hold the tool’s button and select Brush.
- Right-click on the canvas to bring up context menu and choose any round or square brush and set Hardness to zero.
- While your Brush Tool is selected, hold Alt/Option to temporarily activate Color Picker and click near the watermark to select it’s surrounding color
- Paint over the watermark.
Content-aware Fill
If the watermark you have to deal with is plastered over some object of varying colors and textures, simple brushing over will be obvious so you’ll have to do it in some other way.
In newer versions of Photoshop you have the luxury of using Content-aware tools that automatically fill selected areas using some advanced algorithm, which actually works great in most situations. Just to remind us again how close we are to computers doing all of our work for us, whether it’s a good or a bad thing.

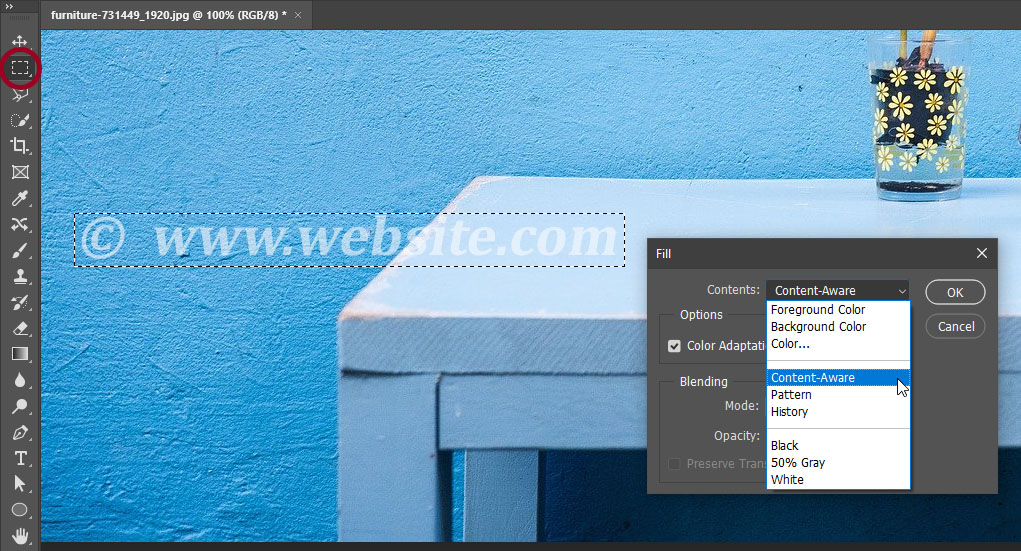
- Select your watermark area using any selection tool, like Rectangular Marquee (M) or Lasso Tool (L).
- Go to Edit > Fill. In the Contents menu, choose Content-Aware, and press OK.
The algorithm will analyze the image and fill your selected area with samples from your image.

Optional step: if there are still things left to be desired, sometimes one adjustment before step 2 might improve the results. Undo last steps by pressing Ctrl + Z, make your selection again and go to Select > Modify > Feather. In the options window, enter Feather Radius, a value around 10 pixels will usually work. This will help to blend in the area that will fill over the watermark. Now do step 2 again. Make sure your selection is wide enough so that feathered area doesn’t leave the outer edges of watermark visible.
Note: newest versions of Photoshop have a whole interface for this, look in the Edit menu > Content-Aware Fill. It has plenty of options to guide the algorithm, like where to take samples from and how to use them, with real-time preview. If simple Content-Aware fill didn’t do the job, 99.9% chance that tweaking the fully-featured version will.
Clone stamp
If modern-day AI still breaks your image, its time come back to basics and go manual with the classic Clone Stamp Tool. It’s a chisel with which you can michelangelo your image from scratch or fix whatever Content Aware tool has messed up.

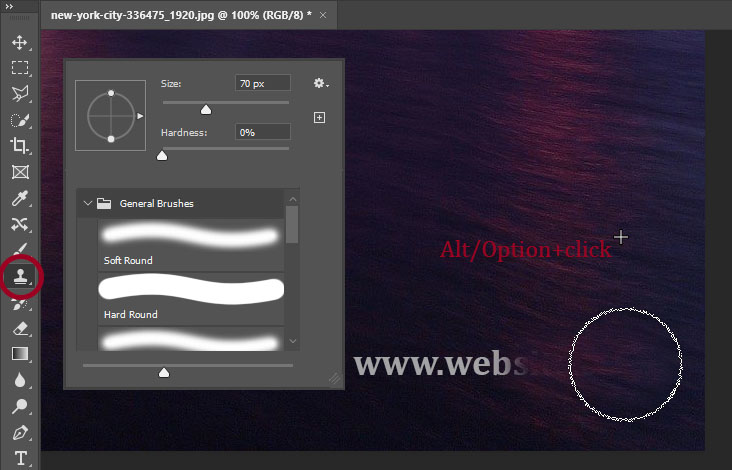
- Press S or chose Clone Stamp Tool on the Tools Panel.
- Right-click on the canvas and choose a soft round brush with hardness set to preferably below 50%.
- Alt/Option-click on an area of the image that is similar in texture and color to whatever’s behind your watermark.
- Paint over the watermark. As you’ll see, it works as a brush but instead of one color it transfers the part of the image that you’ve selected with Alt/Option-click.
Simple monotonous textures will be easy to work with, complex and varying contents will require more work and alt-clicking in different areas.
Tip: Go to Window > Clone Source to bring up Clone Stamp’s options panel.